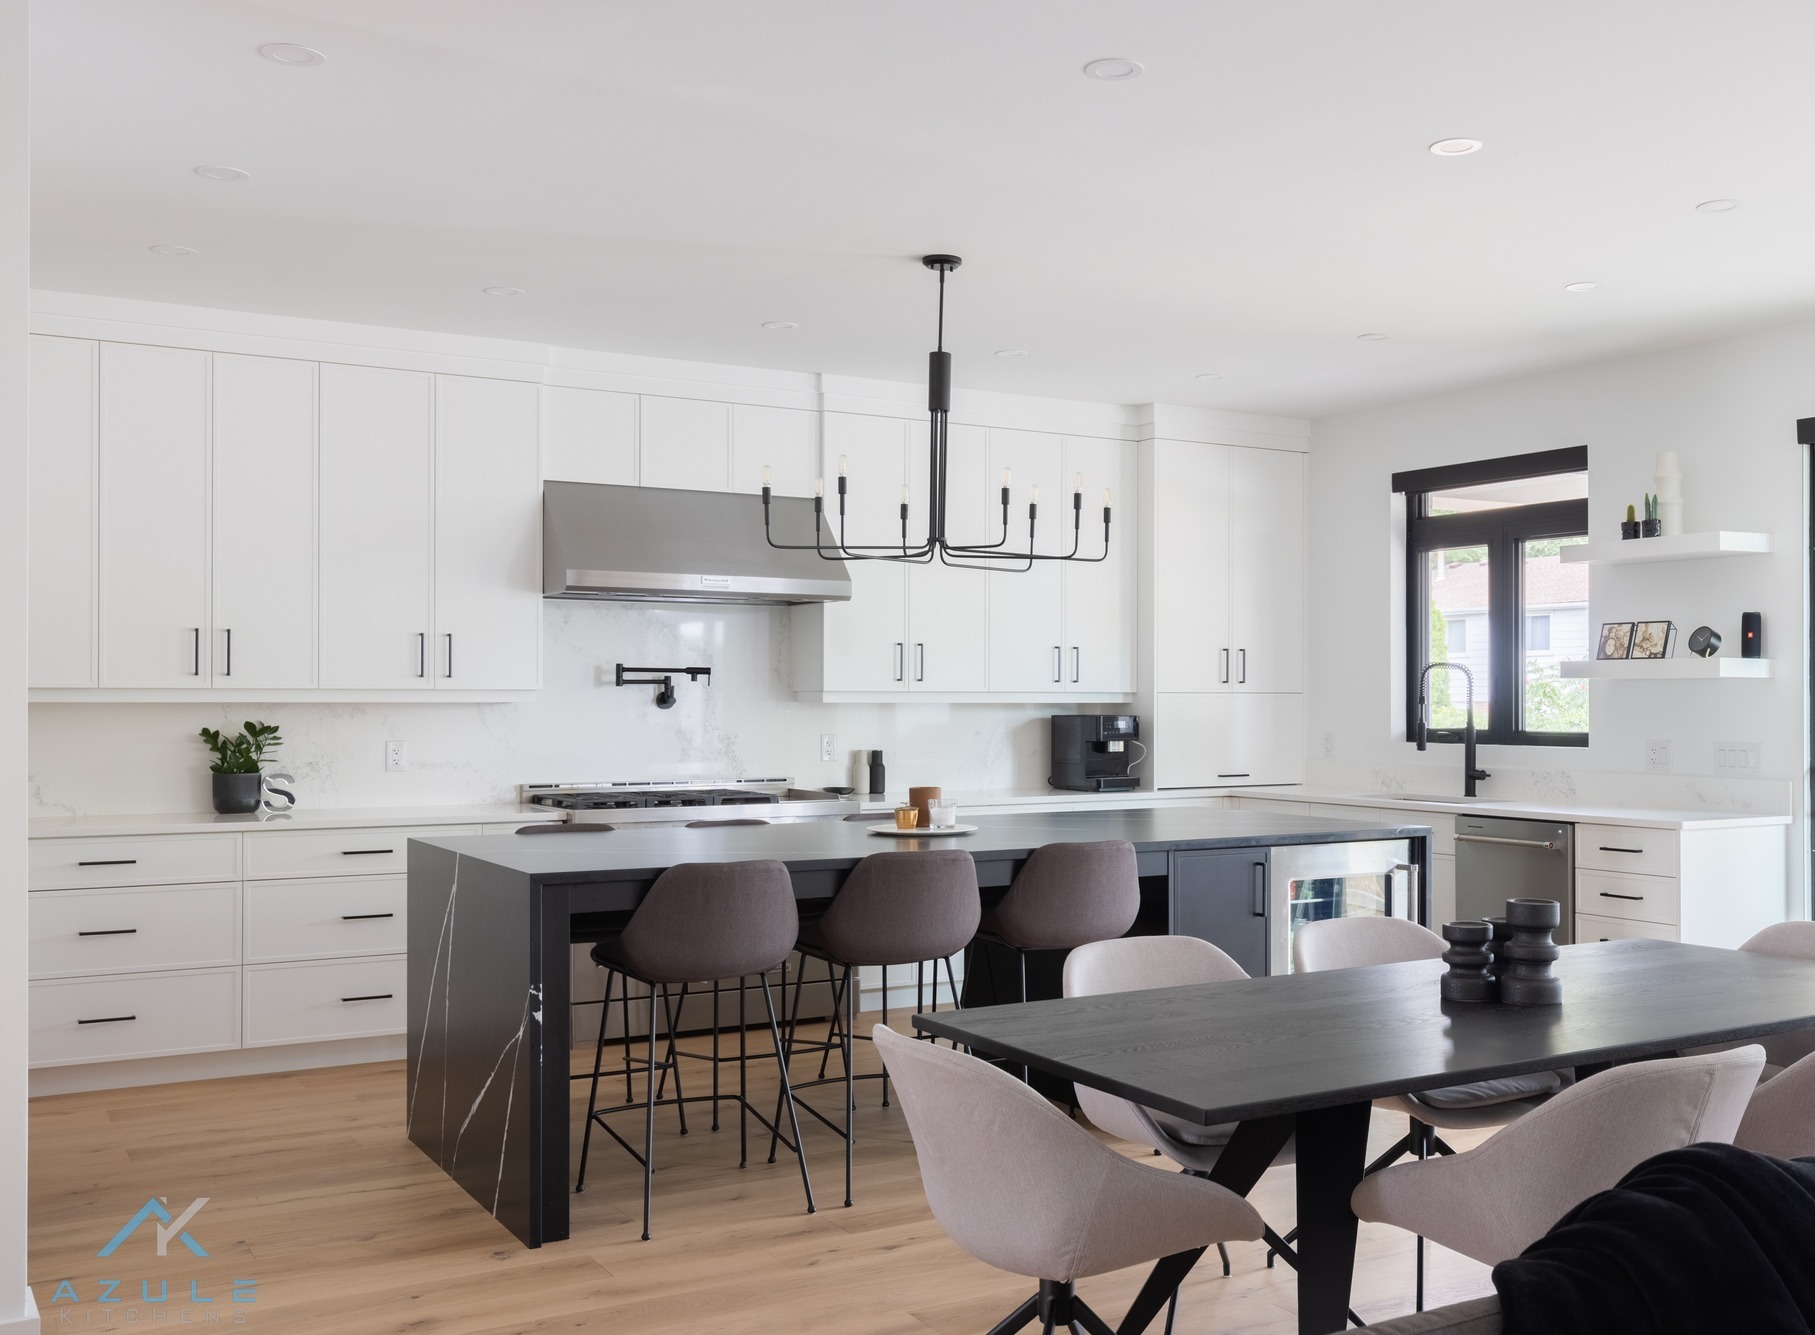
Kitchen Planning

About

Plan Your Kitchen Project

A kitchen is the heart of a home and is a place where memories are shared. It is one of the most used areas in your home and has a huge impact on the overall value. It is important that your kitchen suits your life style and needs while incorporating the perfect mix function and beauty.

To ensure your kitchen fits your space and our designers and team can accurately provide you with a design and quote that you are happy with and has the things you are looking for.

We highly recommend the steps below to help ensure that we are meeting your needs and we are efficient throughout the process of working towards your new kitchen.

At Azule Kitchens colours and door styles are no problem, we offer hundreds of different standard door styles and standard colours, we are also able to custom colour match any colour you bring in and we can make any door that brought to us.

Although colours and door styles are a very important part of your new kitchen, in order to serve you best we recommend starting the process with the design and floor plan of your new kitchen, this is the most important and most time-consuming step towards your new kitchen and has the biggest impact on price. Once we have achieved the desired layout and design is when we recommend to start finalizing on your new kitchen colour and door style.
1. CREATE A KITCHEN WISH LIST

A new kitchen wish list is a very important beginning step to start the process of your new kitchen. It helps you determine what your likes and dislikes versus the things you need and may not need in your new kitchen.

We recommend starting a file or a book that helps you gather and organize some of the likes and dislikes of kitchens you see to help in determining things you may want in your new kitchen. Some of the best places to look to find ideas is our website, photographs from the internet or magazines.

Some of the things to consider in your new kitchen search are kitchen styles, colours, finishes, hood/ stove areas, fridge area, islands and inserts. Other things to consider are door styles, decorative elements, countertops, wall colours, etc.

2. CREATE A FLOOR PLAN

Another very important preliminary step towards your new kitchen is your floor plan. Please keep in mind that a final site measure will is required by one of our experienced team members before we start production of your kitchen to ensure 100% accuracy and attention to detail. However, we recommend that you do a preliminary measure of your kitchen space and draw it on a piece of paper.

For this, we recommend downloading our kitchen planner in the link below. Our kitchen planner will help you by providing a step by step guide to measuring your space along with other valuable information.

We ask you to also include pictures of your old kitchen and/or kitchen space and floor plan. The floor plan will include all window and door locations, wall measurements, utilities locations and may or may not include appliance sizes you are wanting to do.

It is also helpful to do a sketch of what you envision for the layout in your new kitchen. Some things to consider is where you would like appliance locations to be, any walls or windows being moved or removed, cabinet inserts, and what you may like to do in certain areas.

3. SPACE AND ROOM PLANNING

Once you have completed your kitchen wish list and a floor plan, we ask you to look at the plan you have created and envision where you would like your appliances and any other items to be.

It is also helpful to look at your floor a plan and your space and try to see if what you are envisioning in your space will work. Some questions you may want to ask yourself while looking over your plan is: Where do I want my appliances to be? the fridge, stove or hood I want to do feasible for this space? Will the island size I want to do work with my floor plan? is there enough room for what I envision to fit in my space? Where are the items of my kitchen wish list going to be and where would they be most functional? Am I taking down any walls, moving any electrical or plumbing, if so, are they possible to move?

Remember, our knowledgeable and helpful team is always here to help with any questions you may have.

4. BOOK AN APPOINTMENT WITH AN EXPERIENCED DESIGNER

Now that you have taken the first steps in creating your dream kitchen and have a good idea of what your vision is and what your needs and wants are, please contact our showroom and we would be more then happy to book an appointment with one of our knowledgeable and experienced designers.

Please remember to bring in or email us all the information and planning you have put together so that we can be sure to work efficiently with in creating your dream kitchen space.

Standard Cabinet Construction:

OUR CABINET BOX ASSEMBLY:

3/4" and 5/8" side gables with a dado joint around the cabinet backs

Assembled with a dado joint, staples and adhesives then pressed together with a hydraulic press

Unique Series - 3/4" plywood cabinet back

OUR DRAWER BOX ASSEMBLY:

Dovetail jointed drawer box construction as a standard

Adjustable drawer fronts with soft-close slides as a standard

BLUM Legrabox drawers available in Unique Series as an upgrade

Walnut dovetail jointed drawer boxes and several other options in the Ideale Series

DOOR OPTIONS:

3/4" 7/8" and 7" door thicknesses

1-piece MDF doors

5-piece wood doors

1-piece & 5-piece

engineered doors Hundreds of door styles and colours to choose from

HINGES AND SLIDES

BLUM/Hettich/Richelieu 6-way adjustable 110-degree hinges with soft close

BLUM/Hettich/King full extension undermount glides with integrated soft closing pistons

All doors and drawers have soft close as a standard

CABINET INTERIOR COLOUR

Stimulated Maple (Available in All Series)

Peppercorn Interior (Unique & Ideale Series)

White Interior (Available in All Series)

Plywood Interior (Available in All Series)

Walnut Interior (Ideale Series)

GABLES, PANELS, SHELVES AND KICKPLATES

3/4" thick adjustable shelves

Unique Series - 3/4" plywood cabinet back

5/8" & 3/4" plywood kick plates

Azule Kitchens Cabinetry Care and Cleaning Guide

Azule Kitchens understands the importance of keeping your cabinetry cleaned and well taken care of. Having the correct tools and techniques that are safe for maintaining your cabinetry is an important part of ownership and has a big impact on ensuring your cabinets have a long-lasting impression. Please read through and follow the guidelines in the Care and Cleaning Guide below.

The below guidelines are recommended by cabinets purchased from Azule Kitchens. We cannot guarantee the same techniques can be used on another brand or manufacturer of cabinetry without causing damages or voiding warranties.

REGULAR CLEANING OF CABINETS

Keep cleaning of cabinetry to a minimum. Excessive cleaning is not recommended for cabinetry or wood products. When cleaning always use a very soft and clean microfibre cloth or a soft and clean polishing pad. See below sections of "other things to be aware of" and "products to avoid" for further information.

Dusting of Cabinetry - Cabinets should be dusted periodically. Always dust your cabinetry with a moistened soft polishing cloth, do not over moist the cloth and quickly dry ay excess water or moisture. Do not use 'dry' dusting techniques. It is also good practice to follow the grain of the wood while dusting, going against the grain is more likely to cause scratches.

Cleaning of Cabinetry - Use a clean soft microfiber cloth dampened with a very small amount of warm water. Immediately dry the areas with a second soft microfiber cloth. Use a slight amount more pressure for stubborn areas.

FOR USE ON STUBBORN GRIME

This step is to not be used as a regular cleaning technique and is to be used only after trying the first regular cleaning steps. For difficult situations use a mixture of approximately one tablespoon of dish soap (not detergent) per gallon of fresh and clean lukewarm water. Use the mixture sparingly and do not use excessive amounts. DO NOT USE other cleaning products.

Use a clean, damp microfiber cloth or a soft fumiture polishing pad with a small amount of the above mixtures with an appropriate amount of pressure. Do not over do it and do not use excessive pressure.

After cleaning your cabinets, wipe them down with a second clean, damp microfiber cloth or a soft furniture polishing pad to get any soapy residue off. Leaving any soap residue or leftovers will eventually harm your cabinetry after extended periods or use.

The areas MUST be dried immediately with another microfiber cloth or a soft furniture polishing pad.

FOR SPLATTERS AND SPILLS

Make sure to wipe them up quickly before they penetrate the finish. Follow the instructions above in the "To Clean Cabinets” section. Prolonged exposure to food, water, grease & oil splatters and other debris can cause permanent damage or discoloration to your cabinet's finish.

CLEANING YOUR COUNTERTOPS

To Clean Quartz and Granite Countertops - Mix a solution of 1 tablespoon of dish soap detergent and 1 gallon of water in a spray cleaning bottle. Spray on your countertops, wipe and then dry.

Granite Countertops are a natural porous stone and need to be sealed once a year to ensure that they do not collect bacteria's and to prolong the lifetime of the stone.

GLASS DOOR CARE

Clean the glass by spraying an ammonia-free glass cleaner on a clean, soft, lint-free cloth or paper towel (not on the glass itself) and wipe down the glass.

Avoid spraying cleaner directly on the glass as overspray or running of cleaner may cause damage to wood finishes or other materials.

DECORATIVE HARDWARE

Periodically use mild soap and warm water to clean door and drawer hardware. After cleaning, dry and buff hardware with a clean, soft cloth.

Do not use any cleaning products or polishing products. Cleaning and polishing products contain harsh chemicals that can damage the hardware's surface and wear factory finish and protective coating.

I HAVE A NICK ON MY WOOD OR PAINTED CABINETRY

Touch-up kits are available for purchase to help hide surface damage on cabinetry. Please keep in mind some finishes are very hard to cover or touch up damages. Painted, matte and high gloss finishes are especially hard to touch up. Keep in mind the touched-up areas will never be an exact match to any factory finished product.

The kit will contain instructions on what to do - the touch-up pen will hide minor blemishes, while the tinted putty stick will fill deeper scratches, gouges or nicks.

Wood will expand, and contract based upon the amount of moisture in the home. Maintaining a consistent temperature and humidity level is key to cabinet health. We recommend putting a temperature gauge that shows the levels of moisture in your home close to the cabinetry area(s). The humidity level should be around 45% to 55%. Anything below or above or large increases or decreases of humidity levels will cause deficiencies over time.

HUMIDITY LEVELS OF THE HOME

Wood will expand, and contract based upon the amount of moisture in the home. Maintaining a consistent temperature and humidity level is key to cabinet health. We recommend putting a temperature gauge that shows the levels of moisture in your home close to the cabinetry area(s). The humidity level should be around 45% to 55%. Anything below or above or large increases or decreases of humidity levels will cause deficiencies over time.

Wood products absorb moisture and swell or expand with high humidity conditions and wood products release moisture and shrink or contract with low humidity conditions.

OTHER IMPORTANT THINGS TO BE AWARE OF

Do not drape dry, damp or wet dishtowels or cloths over your cabinet doors. Dry towels can scratch the finish and moisture can cause permanent damage, like peeling and discoloration to the cabinet finish. Dry wet surfaces immediately using a soft clean microfiber cloth.

Heat from the self-cleaning oven feature is much greater than normal cooking temperatures and could potentially damage surrounding cabinetry. While it is a rare occurrence, minimize the risk of cabinet damage by removing cabinet doors and drawers closest to the oven before using the self-cleaning feature.

Steam and cooking products will damage your cabinets and finish. It is recommended to us these items on an area where there is not cabinetry beside or above the item.

Direct sunlight will eventually darken, fade and/or discolour the color of cabinetry products and finishes. Draperies or blinds are the best defense to shield cabinetry from direct sunlight.

PRODUCTS TO AVOID

Harsh cleaners, detergents, mineral spirits, strong soaps, multi-purpose and abrasive cleaning products..

Eco friendly, natural or organic products are not safe for cabinetry

Silicone based cleaning, waxing or polishing Sponges products. Please Note: This is only a recommendation guide; we are not responsible for any damages or defects that arise from any recommendations above from any cleaning or other products used on cabinetry.

PLAN YOUR PROJECT

At Azule Kitchens our reputation has been built on many years of trust, superior craftsmanship and customer service. Our company is focused on providing exceptional results through and our proven process we ensure your new cabinetry will have a lasting impression with the perfect balance of lifestyle, personality and functionality.

Our planning guide helps provide your designer with the information needed to start the design and quoting process. After your design is complete, your designer will provide you with a quotation for your cabinetry. We recommend visiting our ‘Plan Your Project’ page on our website for helpful information.

START HERE:

You will need: a tape measure, pencil or pen, a phone camera or camera and an extra set of hands if available. View the 4 pages in this package.

Start by following the example floor plan on page 2 and guidelines below.

Draw the floor plan of the room in which the cabinetry is planned to go on page 3 and continue to page 4.

All measurements to be in inches only. Do not include any existing cabinetry measurements in the drawing.

Start by measuring the sink first. Then measure the total length of all walls from corner to corner or wall to wall.

Next, measure the widths of all windows, doors and walkways from the outside edge of the trim to the outside edge of the trim. Be sure to indicate the direction of all door swings.

Measure the rooms ceiling height. Indicate any bulkheads, special items being kept or vaulted ceiling areas.

APPLIANCES: Insert the sizes of your existing or new appliances in area provided on page 4. If you do not know, leave the area blank. Your designer will help you to determine your appliances.

DOUBLE CHECK: All measurements and that all measurements are included.Example: ALL the walls lengths, window widths, door and walkway widths, ceiling height, etc.


    AZULE KITCHENS OFFICE USE ONLY

    Notes ----------------------------------------------------------------------------------------------------------------------------------------------------------------------------------------------------------------------------------------------------------------------------------------------------------------------------------------------------------------------------

    APPLIANCES M PROJECT ESTIMAT 60 3/8"CEILING HEIGHT DO YOU HAVE NOTE: 159 1/2" -36"- Door -63 1/8"

    AZULE KITCHENS SAMPLE FLOOR PLAN -48 1⁄2" 24"

    Custom kitchen or Cabinetry

    Design Custom Cabinetry tailored to your space at an affordable price.

    Build Local Canadian Made Cabinetry

    Install, Service, warranty

    When you buy an Azule Kitchen you are not just buying a kitchen, you are buying a unique hand designed cabinetry for your individual needs and space.Our cabinetry is Canadian made hand made Canadian custom kitchen built to provide you with top quality handcrafted long lasting cabinetry.

    Have a project in mind? Let’s get to work.